Welcome

My name is Lisa and I'm a crafty girl with wanderlust working as an engineer by day. My blog chronicles projects in my home as well as pictures and stories from my travels.

Search


Instagram

Blog Index
The journal that this archive was targeting has been deleted. Please update your configuration.
Navigation

Entries in Dessert (14)

Sunday
Nov252012

How to Make a Lattice Pie Crust Top

For Thanksgiving this year I made a few pies and I took a some pictures so that I could share how to make a traditional lattice pie crust top.

A lattice top is a classic that always looks pretty. It seems like it could be a lot of work but it really isn't. Here are some simple instructions to try it if you've never done it before.

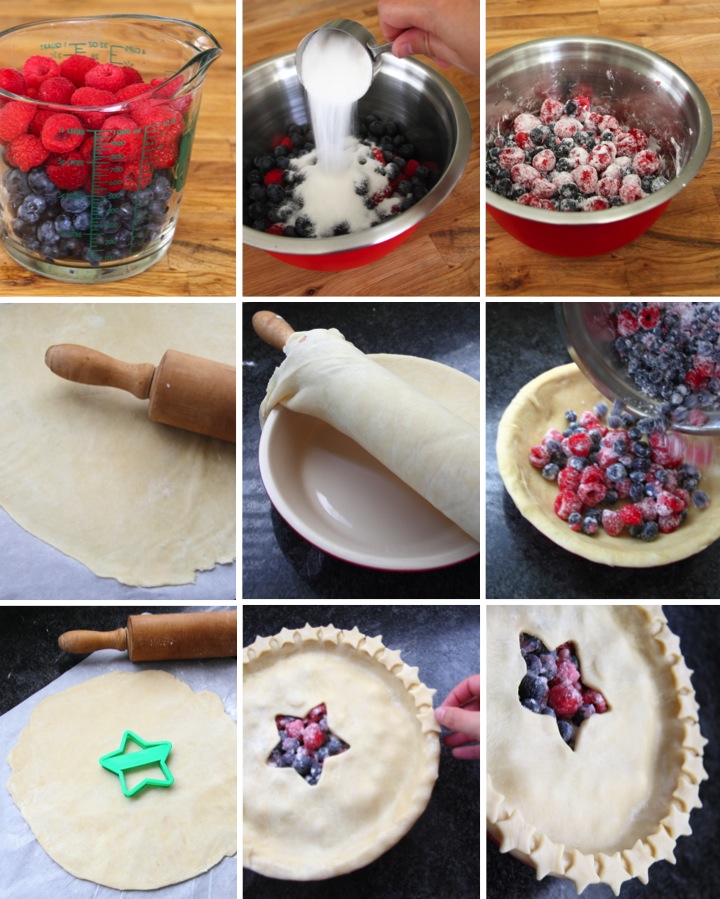
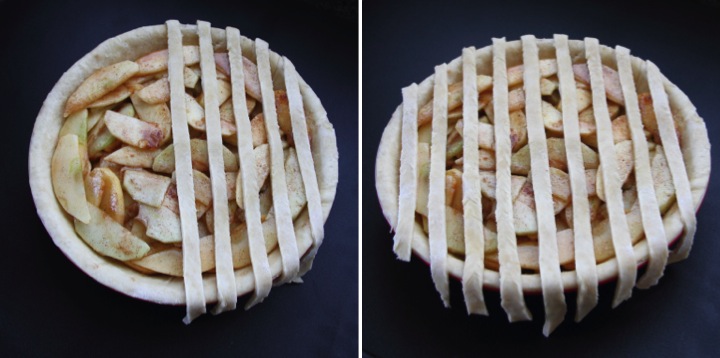
To start, roll out the top crust (it is easier if the dough has been chilled first) and then cut it into strips of an even width. I just use a knife to cut my strips, but you can use a pastry wheel or pizza wheel as well.

Once you have the strips all cut, drape a strip across the middle. Working out from the center, lay out the strips on one side and then the other until the whole pie is covered, spacing them one strip width apart.

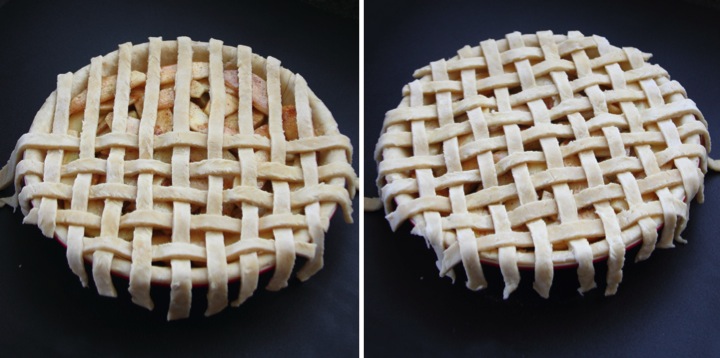
Next, fold back every other strip on the top of the pie. Make sure to fold it back a little more than halfway. Lay a strip across the middle of the pie, perpendicular to the other strips.

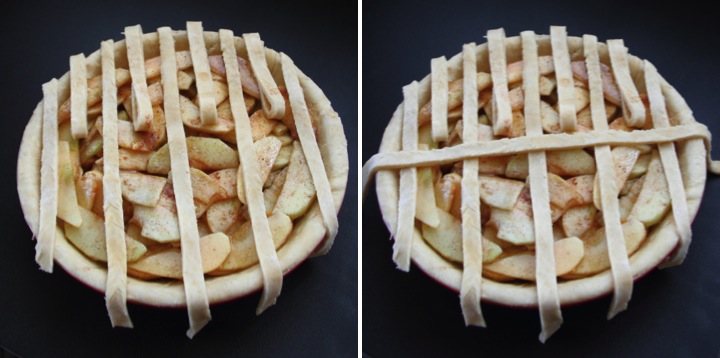
Now fold the strips back down over the middle strip that you just laid down. Every other strip will be on top or underneath it. This is the start of the lattice.

To make the next lattice piece, fold back every other strip again but this time you want to fold back the ones that were underneath the middle strip. Lay down another strip of pie dough and then fold the strips back down.

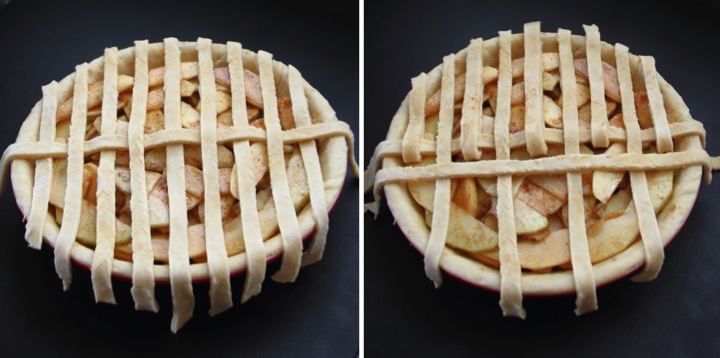
Repeat the same process of folding back strips, laying down a perpendicular strip and folding the strips back down, alternating which strips you fold back each time. Once the pie is covered in one direction, perform the same process on the other side of the pie.

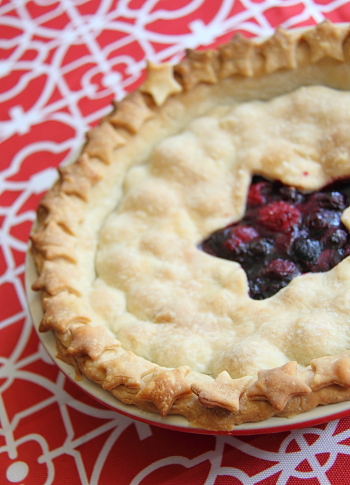
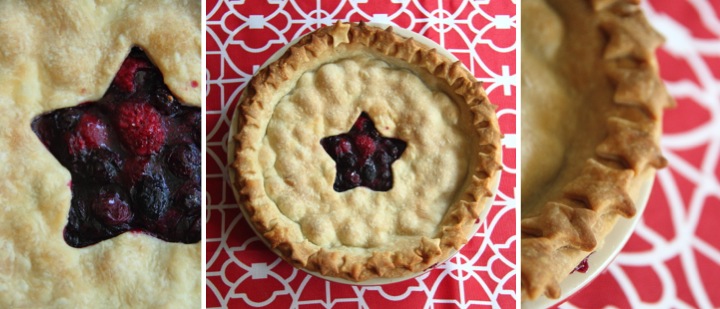
To finish simply trim the ends of the strips. If you want you can leave it (just pinch the strips down into the bottom crust to seal it) or you can make a fluted edge.

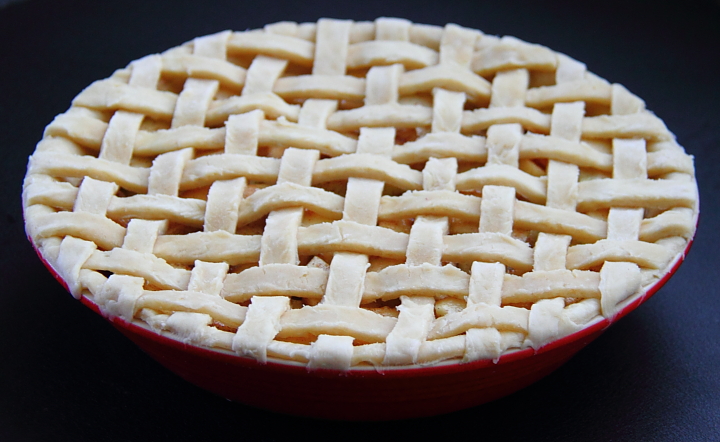
That's all there is to it. It looks quite fancy but it is simple to do in less than ten minutes. Easy as pie!

Wednesday
Jul042012

Mixed Berry Pie for Fourth of July

Happy Fourth of July! Although it is blisteringly hot and humid here in Michigan I felt compelled to make a pie this morning to bring to the Independence Day get-together that I am going to this afternoon. The first reason is that so many wonderful berries are in season and just begging me to bake with them. The second reason is that pie is delicious.

I love making mixed berry pies with all sorts of fruit combinations: strawberries, black raspberries, blueberries, rasperries, blackberries... you get the picture. It is a great and delicious way to use up whatever fruit you have on hand. Today I paired some blueberries and raspberries since it makes a festive color combination. The pie smells delicious and I am having some serious will power issues not cutting into it before I head to the party. 

Ingredients List
- 4-5 cups berries (depending on the size of your pie pan)
- 2/3 cup sugar
- 3 tablespoons cornstarch
- Double pie crust pastry

Directions
- Toss the berries with the sugar and cornstarch to coat and let sit for at least fifteen minutes
- Roll out half of the pastry and line the bottom of a pie plate with it, trimming off excess
- Roll out remaining half of the pastry
- Add berries to the pie plate and then top with pastry
- Trim excess pastry, crimp the edges and cut vents in top crust for steam to escape
- Bake for 45-55 minutes at 375° F until the crust is golden and the filling is bubbling 

Tips and Tricks
- I make my own crust (I'll share the recipe in another post) but you can also use store bought
- To make your pastry easier to deal with, keep it in the refrigerator until you are rolling it out
- To prevent your crust from browning too much, wrap it in tin foil for the first 25 minutes of baking
- Part of the fun of making pie is being creative with the vents on your top crust. I love making a woven top, but since today is Fourth of July I used star shaped cookie cutters to make my vent. Any large vents should be made before you place your top crust on your pie 

Wednesday
Jun062012

Peanut Butter Balls

When I was a little kid I absolutely loved peanut butter balls. Since the recipe is no bake I could make them myself with no adult help needed for the oven. Shaping the balls was also a lot of fun for me and I would make all sorts of variations like hearts and cubes. As much fun as making them was, eating peanut butter balls was even better. In my world peanut butter + chocolate + sugar = delicious any day of the week.

As I've grown older the amount of sugar in the original recipe became a little too much for me so I have reduced it to accomodate my tastes. Don't worry, though, they are still plenty sweet!

The recipe is fast and easy to make. Using the mini chocolate chips is nice because it is super quick unlike some other recipes that call for dipping peanut butter balls in melted chocolate.

The recipe also freezes well so I like to keep some unformed dough in ziplock bag in my freezer. After a little bit of thawing I form as many as I need and then pop the rest back in the freezer. As a word of caution, these can be terribly addictive so be careful!

Ingredients List
- 1 cup butter (softened)
- 2 cups creamy peanut butter 
- 4 cups powdered sugar (about 1 lb.)
- 2 cups miniature chocolate chips

Directions
- Cream softened butter and peanut butter in a bowl until smooth
- Mix in powdered sugar one cup at a time and stir until thoroughly mixed
- Stir in chocolate chips
- Place in refrigerator for at least 30 minutes to chill
- Roll teaspoon sized amounts of the dough into balls and place onto cookie sheet lined with wax paper or parchment paper
- Place in refridgerator to chill
- After balls have firmed up stack in a container and store in refrigerator until ready to eat 

Tips and Tricks
- If you would like the peanut butter balls sweeter, feel free to add more powdered sugar. I wouldn't recommend using less, however, since the dough might not be stiff enough to form into balls anymore.
- When you are forming the balls if the dough starts getting sticky you can either dust your hands with powdered sugar or pop it back in the refrigerator for a bit
- The balls are fine at room temperature but they can get a little sticky if it is hot out so I like to store them in the refrigerator until they are ready to be eaten
- This recipe makes a fairly large quantity so I like to put about half in the freezer. You can either put the unformed dough in the freezer or put already formed balls in the freezer. 

Tuesday
Feb142012

Valentines Day Mini Heart Cupcakes

Happy Valentine's Day! Last night I made these mini cupcakes to give to Frank today for Valentine's Day. Since it was a week night I wanted to do something simple but festive so I made little candy hearts to top the cupcakes for decoration.

While my cupcakes were baking I melted some red candy melts in a squeeze bottle on low heat in the microwave. I laid out a sheet of wax paper on my work surface and drew hearts on it with using the melted candy. If you have to use too much pressure to get the candy to come out of the bottle, just pop it back into the microwave for a few more seconds. Conversely, if it is coming out too easily and making a mess, a little time in the refrigerator will get the candy to the right consistency.

When I am making candy designs like this I like to make extras in case I don't like how some turn out or some break. Any that you don't use you can melt down to use again or you can just eat them like me. Also, I did mine free hand but if you want a little more consistency or have a more elaborate design, draw or print out your design on paper. You can then place the paper under the wax paper and just trace your design. 

The hearts will firm up pretty quickly, but if you want to speed up the process placing them in the refrigerator will do the trick. Once the hearts are completely cooled you can just peel them off the wax paper.

To decorate my cupcakes I iced the top with buttercream icing using a #18 star decorating tip and then placed one of the candy hearts on top. I think they look cute and I hope that Frank likes them.

Is anyone else making some sweets for their sweet? What kind of homemade treats do you like best?

Page 1 2