 After making my sweater vase I thought I would create some wall art to continue with my Autumn decorating in my living room. I wanted something that would work for both Halloween and Thanksgiving and figured that mini pumpkins would be a perfect fit.
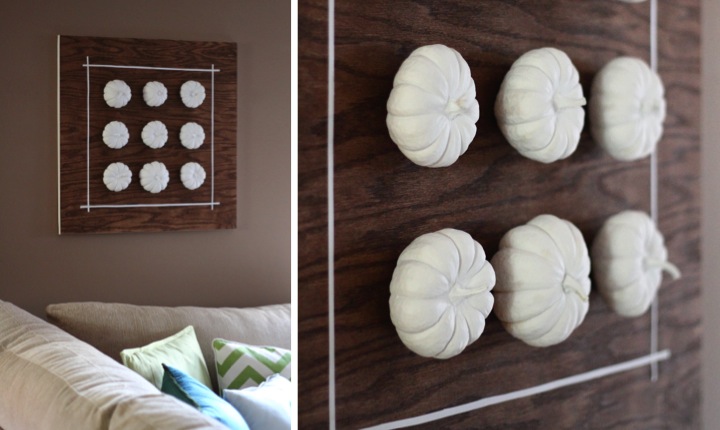
I came up with the idea of mounting the pumpkins in a little three by three grid and headed to Lowes to figure out a good idea of something to serve as a mounting board. I toyed with the idea of planking together some boards, but when I saw that I could get a 1/2" thick 2' x 2' oak plywood panel for $8.50 I was sold on that solution. I picked out the panel with the prettiest grain and picked up some white mini pumpkins on my way home.
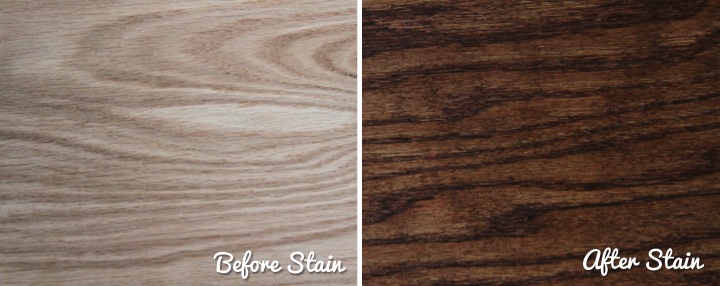
With supplies in hand I started by staining the plywood with Watco Danish Oil in Dark Walnut. I like using it because it is really easy and you can't really screw it up. That's my kind of staining! After you prep your surface by sanding and wiping it down, you simply flood it with the Danish Oil and use a rag to spread it around until the whole surface is covered. After letting it penetrate for half an hour you apply the Danish Oil in the same way again. Fifteen minutes later you wipe off the excess and your piece is ready to use eight hours later. Here is my plywood before and after I stained it:
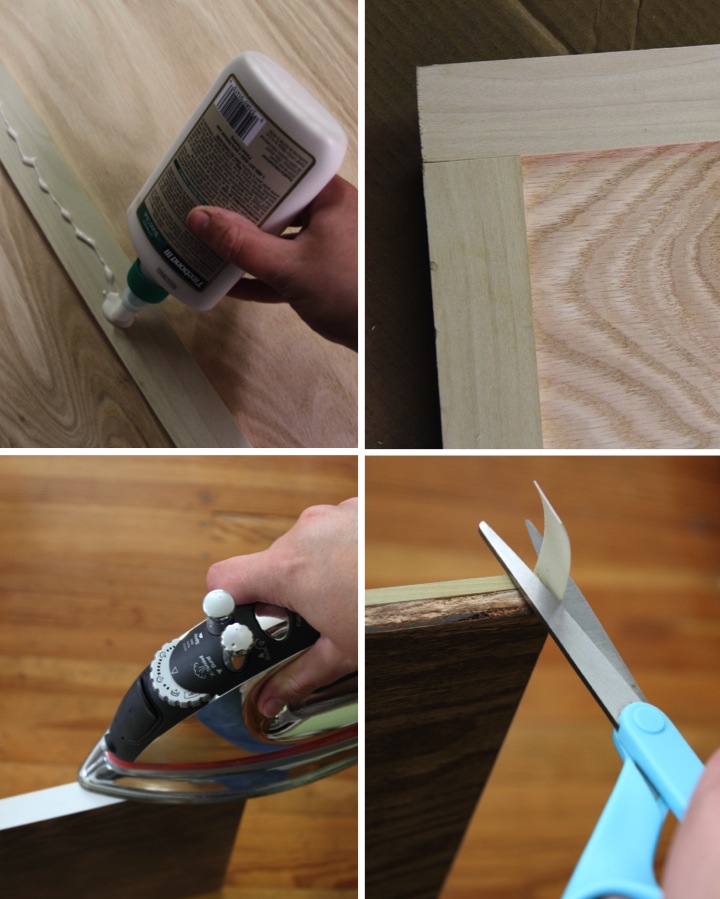
Since I was using plywood I had to figure out a way to cover the rough edges. I decided using some white iron-on melamine banding would be fun and help set it off from the wall. The edging I had was 3/4" thick and I thought it would look neat if the board seemed thicker so I took some scraps that were 1/4" thick and used wood glue to attach them around the perimeter on the back. After that I simply cut the lengths of the banding that I needed and ironed it onto the edge.
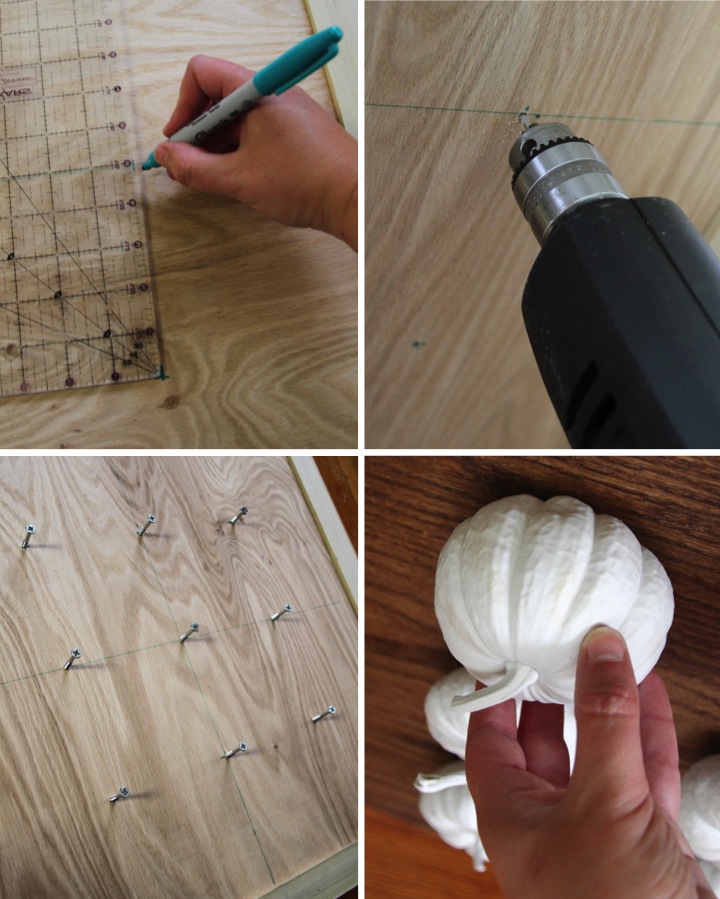
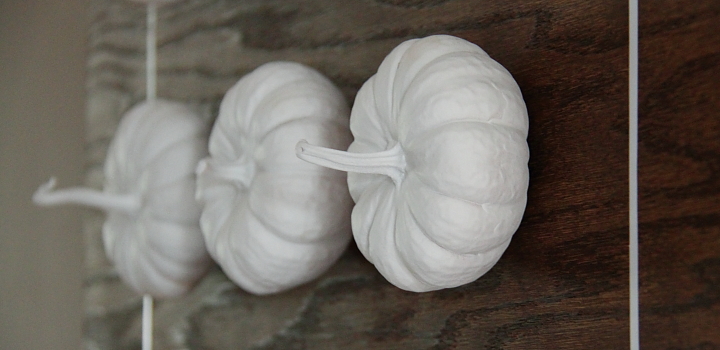
Next up I tackled the mini pumpkins. I had purchased white ones, but they are really cream colored and I thought a true white look would be better for my project, especially since I had used the white band for the plywood. That was an easy fix with a can of white spray paint. With two light coats of matte white I think the pumpkins almost look like little ceramic sculptures.
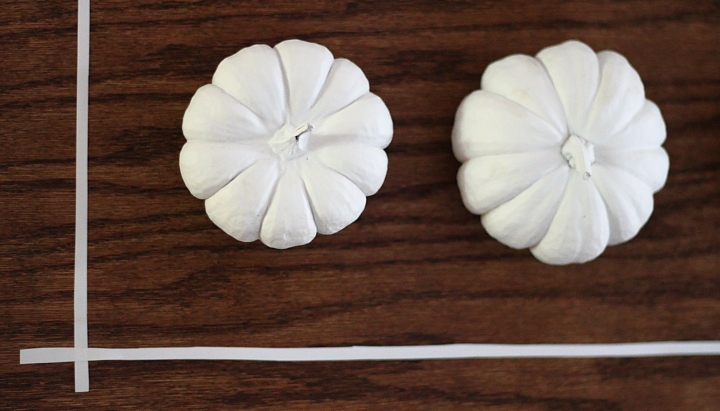
Once everything was dry I was ready to start assembling. On the back of the board I marked the center and then marked the remaining eight locations for pumpkins in a grid with 5" spacing. I drilled pilot holes at each of the locations and then started 2" screws in each hole. To mount the pumpkins I held them over the pilot hole in the front and the drilled the screw from behind the plywood into the pumpkin.
With the pumpkins mounted I thought it looked really cute but needed a little finishing touch. I took some scraps of white vinyl contact paper cut it into 1/4" wide strips and made a border around the pumpkins.
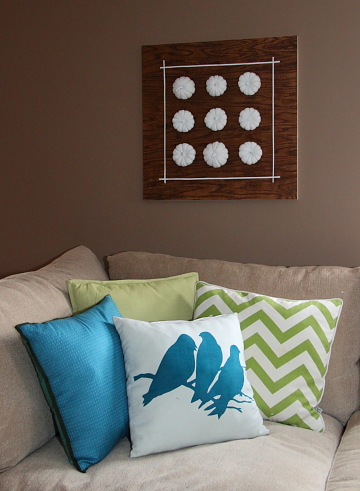
I think my mini pumpkin wall art turned out really cute. It is festive, but the neutral color scheme doesn't clash with the colors in my living room.
Are you doing any decorating for fall? Have you ever spray painted pumpkins?
P.S. If you are interested, I've gathered together a gallery of my autumn related posts: Gallery of Fall Posts & Projects